
9 posts tagged with "harness"

View All Tags

· 6 min read
Krishika Singh

In a recent survey, we saw that developers spend 30-40% of their time writing codes, now the question arises of where the rest of 70-60% of the time goes. It is spent managing features, fixing deployment issues, and reporting to various stakeholders when things go wrong.

There is a common solution to all these use cases i.e Feature Flags.

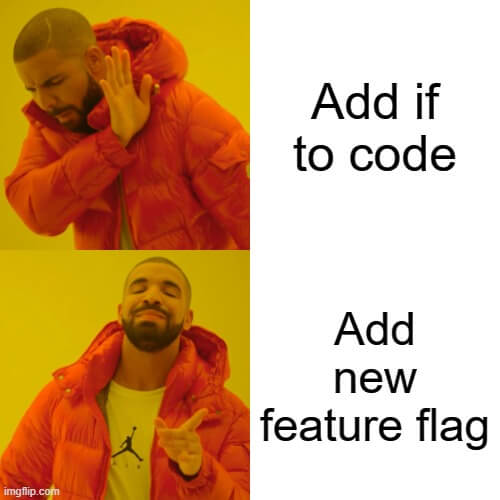
Feature Flags are nothing but conditional statements (think of them as an if-else statement), which is what makes them so adaptable in the ways that they solve many use cases that we are going to discuss further in the blog.

With this, I am going to discuss a few use cases in this blog and will be seeing how a particular use case is without FF and then see how it can be done with Harness Feature Flags.

1. User Targeting

User Targeting allows only subsets of user access to a particular feature. This could be a single customer who has requested a new feature or even it can be used for things like only paying customers will have access to a particular feature.

Without Feature Flags

In order to target users, devs have to stand up some way to recognize a user based on attributes and then build a mechanism to only show them that feature. This can be done using a combination of runtime environment variables and backend database entries. Usually, these requests come from the customer-facing team and sales. For developers to field these request means taking time out to properly understand who target users are, and what attributes define them and then testing the changes performed in the lower level environment to make sure nothing unusual happens and then pushing the code live and sometimes the app or service needs to be restarted again for these changes to take effect.

With Harness Feature Flags

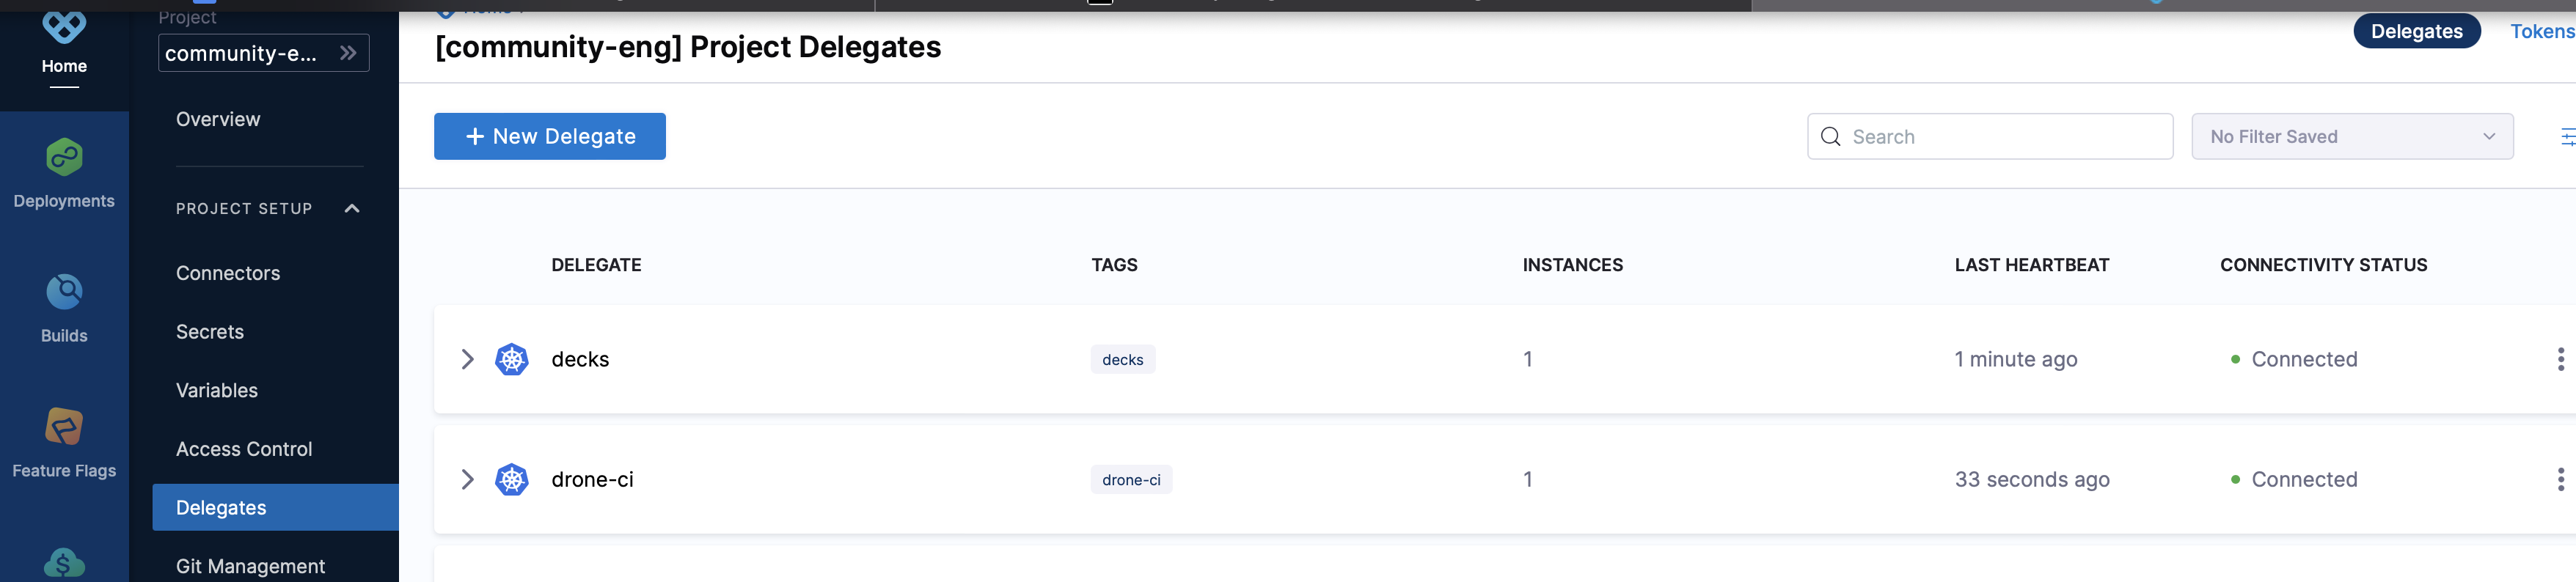
Harness Feature Flag provides the basic user targeting capabilities that product development teams are looking for and additionally lets you automate the process with progressive delivery: roll out to small user groups, verify behavior, manage changes, expand user groups and repeat until you reach 100%.

When you create a Feature Flag in Harness, you will be asked to select the type of flag you want to use, and then you will be prompted to define user attributes that will determine whether the feature will be available to them or not. This targeting can be done in the code via the developer or in the UI by a non-developer and the changes will sync instantly.

2. Testing in Production

One cannot validate a feature unless and until it's live in front of real-time users - something you can not replicate in pre-prod. Without a technique to test in production with real-time users, you might take 3-4x as long to release the feature to the customers.

Without Feature Flag

Without Feature Flags, testing a new feature is the same as deploying a completed feature to production. That is super stressful, especially if you are making a major change like overhauling the UI or migrating to a new database. I am sure you don't want a new ticket telling you that your implementation was wrong and that you need to redo it. You just don't know what is going to actually happen in production and that is a tough reality.

With Harness Feature Flag

How you want to test in production with Harness depends on what kind of feature you are planning to test. There are some common things Harness helps with as you instrument and run your tests.

  • First, you have flag evaluation metrics which will be helpful to see how often a flag is being evaluated, by which sets of target groups, who are making the changes internally, and what changes are being made.

  • Second, If you know you want to test the feature, you can automate the setup of these tests using a pipeline that sequentially setups and runs for a defined amount of time. You can say, you want to test a feature with 10% of users for 2-3 days after getting approval from you, and then roll it out to different 25% of users with slight variation and repeat this until the test is completed.

3. Trunk-Based Deployment

In trunk-based development, each developer divides their work into small batches and merges that into the trunk at least once or several times a day.

Without Feature Flag

Suppose a feature that is being developed takes more than one sprint. There are two options:-

  1. Merge the unfinished code to master making sure nothing breaks.
  2. Let the branch be there for a long and risk the code base changing significantly by the time PR is raised and deal with merge conflicts.

Both of the above two scenarios aren't ideal because they take a significant amount of devs' time for something that isn't core to the job and also a lot of risks are involved if something breaks in the productions side of the house then a lot of rework is needed to once again separate the code.

With Harness Feature Flag

Once a new code is wrapped up inside a feature flag it enters a safe one and won't cause disruptions in the main application and it simplifies both scenarios discussed above.

At its core, Harness Feature Flags by virtue of being used enables trunk-based development. Harness makes it easy by ensuring all releases meet governance standards no matter how small or large is the change. Also, you can set up your own governance guardrails as part of your feature release pipeline to ensure every time the feature is merged into the main trunk and set for release it can be run against a release pipeline to make sure it meets standards and reduce the risk associated. And for the code sitting around for a while, Harness also calls out stale flags so that they can be removed from the system altogether.

Conclusion

Feature Flags for sure is a powerful addition to agile development and give teams more control of their codebase and also end-to-end experience.

So, what you are waiting for visit Harness and try out Harness Feature flags.

You can also visit Harness docs to learn more about Feature Flags as well as learn how you can use them in your applications.

· 3 min read
Krishika Singh

What are Feature Toggles/Feature Flags?

Feature Toggles also called Feature Flags are a powerful technique, that allows teams to modify system behavior without changing the code. It is a set of patterns that can help deliver new functionality to users rapidly but safely. They are great for better control and experimentation of features.

Why Should we use Feature Flags?

  • One should use feature flags as part of their regular development process. Any time you release a feature you should wrap it in a feature flag to test it, control who has access to it and gradually roll it out to the users.

  • One of the biggest challenges the product development team faces is delivering and controlling new features. With continuous delivery and feature flag management, a team can launch and control its features.

  • In Feature flags, you can run canary testing, a technique that allows a team to test a new feature on a subgroup of new users and see how it is performing before rolling the feature out to a wider audience.

  • Feature flags allow you to instantly toggle between different versions of your product. It allows modifying your system behavior without making disruptive code changes.

What are the best practices to adopt while using Feature Flags?

  • Using standardization naming scheme:- People in the organization could start naming the flags with the same name and gettings flags mixed up which could result in activating the wrong flag leading to potential disruptions in your system.

  • Control access to flags:- Set up logging to know which change was made by who, which is important for reducing dependency between the product and engineering team and there will be better productivity a there will be transparency when it comes to making new changes.

  • Conduct regular cleanups for your flags: You need to make sure you are removing flags every now and then which are no longer in use.

Why use Harness Feature Flags?

Harness Feature Flags is made specifically for developers and designed to be fast and easy to use.

Some salient features are:-

  1. Simple UI-Based feature release workflows:- Users have the ability to create templates that they can standardize across feature flags that have the exact operational needs.

  2. Governance and Verification:- Users can ensure production pushes always meet defined organizational standards, and that they can minimize the negative impact of any issues in prod. In addition, users can also automate service verification once a feature is out, ensuring if an issue occurs, the feature is turned off to minimize impact.

  3. Integration into CI/CD/2+2=5:- By presenting the feature flag as a pipeline, feature flag management becomes a natural step in the everyday workflow of development teams and is integrated into CI/CD as a unified pipeline.

  4. Management and Governance: Letting the team build rules and processes and automating cleanups and flag lifecycle management. Ensuring teams can keep their systems secure, compliant, and standardized wherever possible is critical to their goals.

· 3 min read
Debabrata Panigrahi

Introduction

In this tutorial, we will go through a step-by-step example, on how to use the Harness CI for Maven testing.

Pre-Requisite:

Docker Connector to fetch public Docker images of maven chrome jdk8

Let’s now deepdive into the step-by-step tutorial, wherein we will now use the Harness SaaS platform to set-up the maven testing:

Step-1:

Start with the build module, and give it a name test, make sure to keep the clone codebase slider “off” as it is not required in this example.

Step-2:

Now let’s move to the next part of the pipeline, which is to select the infrastructure and select Harness Hosted Builds under the same.

Step-3:

Moving on to the execution step, let’s add a Run Step and name it as “testrun” and under the container registry add the already created Docker Connector, and under the image add the “rvancea/maven-chrome-jdk8”. Now let’s add a shell command to run mvn clean compile -DsuiteXmlFile=Batch1 test and apply the changes.

testrun

Step-4:

Now, let’s add another Run Step similar to the above and name it as reports, just here contrary to the above step the command changes to find . -name "*.xml".

filesgen

Step-5:

It’s time to add the failure strategy now as a Run Step, with the following command.

actualFailedTestsStatus=<+execution.steps.testrun.status>
echo $actualFailedTestsStatus
if [ "$actualFailedTestsStatus" = "IGNORE_FAILED" ]
then
echo "tests have failed"
exit 1
else
echo "Failure reruns have passed"
exit 0
fi

faliurestrat

Step-6:

Now, since the pipeline is complete, let’s save and run the same and the results looks like the following on the console logs.

result

reports

Once the run is successful, the above list of files are generated and can be further stored and processed as the test reports.

For, further reference following is the pipeline yaml of the above mentioned example

pipeline:
name: yaml
identifier: yaml
projectIdentifier: HarnessDemo1
orgIdentifier: default
tags: {}
stages:
- stage:
name: test
identifier: test
type: CI
spec:
cloneCodebase: true
infrastructure:
type: KubernetesHosted
spec:
identifier: k8s-hosted-infra
execution:
steps:
- step:
type: Run
name: testrun
identifier: testrun
spec:
connectorRef: account.harnessImage
image: rvancea/maven-chrome-jdk8
shell: Sh
command: |+
mvn clean compile -DsuiteXmlFile=Batch1 test

privileged: false
reports:
type: JUnit
spec:
paths:
- target/surefire-reports/junitreports/*.xml
failureStrategies:
- onFailure:
errors:
- AllErrors
action:
type: Ignore
- step:
type: Run
name: reports
identifier: failstrat
spec:
connectorRef: account.harnessImage
image: rvancea/maven-chrome-jdk8
shell: Sh
command: find . -name "*.xml"
when:
stageStatus: All
failureStrategies: []
- step:
type: Run
name: failstrategy
identifier: step3
spec:
connectorRef: account.harnessImage
image: rvancea/maven-chrome-jdk8
shell: Sh
command: |-
actualFailedTestsStatus=<+execution.steps.testrun.status>
echo $actualFailedTestsStatus
if [ "$actualFailedTestsStatus" = "IGNORE_FAILED" ]
then
echo "tests have failed"
exit 1
else
echo "Failure reruns have passed"
exit 0
fi
when:
stageStatus: All
failureStrategies: []
properties:
ci:
codebase:
connectorRef: harnessRud
build: <+input>

What’s Next?

The above pipeline and use case was the requirement of one our community user and was built according to their requirements by the community engineering team so, feel free to ask questions at community.harness.io or join community slack to chat with our engineers in product-specific channels like:

· 5 min read
Ritik Kapoor

Billions of dollars are impacted through clouds annually and with experience, organisations are able to observe the bigger picture where cloud costs outweigh the benefits. Harness Cloud Cost Management, an active cloud cost solution can save up to 75% of your cloud spend.

In this blog, we are going to discuss cloud cost solutions which can cut down manual overheads and automate cloud savings when you’re busy writing code.

Getting Started

Now, before we take our discussion to active cloud cost solutions with Harness CCM, let’s get an overview of passive and active cloud cost solutions.

Harness CCM allows an organisation to understand and manage its cloud cost through visibility and automation. On this basis, cloud cost management can be broadly categorised into the following -

  • Passive Cloud Cost Management - Cloud management through such techniques includes visibility into cloud cost and forecast based on usage history. This includes calculating total cost and providing deep root knowledge about one’s cloud spending.
  • Active Cloud Cost Management - An instance, where passive solution alerts about hiking costs, an active cloud cost solution is capable of making intelligent and automated decisions. This can help in scaling down resources and cutting down costs due to idle or over-provisioned resources.

The latter can be achieved through Harness Next Geneneration CCM.

Harness First Gen CCM

Harness First Generation of CCM, provides visibility into your cloud resource at an hourly granularity. It’s a “tag-less” solution i.e you don’t need tagging to get relevant information at any level. It is designed to provide relevant insights into cloud cost which can assist in maintenance and analysis. It has features such as -

  • Anomaly Detection - any sudden change in cloud spending could be notified through slack or email
  • Forecasting - Based on cloud usage history a prediction model tracks and forecast your cloud cost at required intervals.
  • Budgeting - This feature allows you to set budgets at different levels of your organisation and provide you email alerts when spending exceeds the set amount

Harness First Generation is capable of doing root cost analysis if tied up with Harness's continuous delivery service.

Harness Next Gen CCM

Harness Next Gen, provides the visibility of First Gen and is capable of regulating cloud costs through intelligent automation. This makes Harness Next Gen an active cloud cost management solution.

Harness Next Gen enables an organisation to maintain and regulate cloud cost through custom rules which allows scaling down of idle or over-provisioned resources.

Features of Harness Next Generation CCM

Harness Next Gen CCM is an active cloud cost solution with all the features of first-gen and more. Let’s take a look at the key features of Harness Next Gen CCM -

Inventory Management

Harness Inventory Management is achieved through AWS EC2 Inventory Cost Dashboard. It provides granular insights into AWS EC2 instances. It can track various cloud cost indicators across different zones and time ranges. Through visuals, you can understand your cloud cost trends and make decisions based on data and analysis.

You can adjust sliders and groups on the dashboard to filter data as per requirement. For example, set up a date range and select multiple states from running, stopped, terminated etc. This makes the dashboard dynamic and curate graphs and charts as per your requirement.

inventory_ss.png

Auto Stopping Rules

Cloud AutoStopping solves the problems of idle cloud wastage and automates cost savings. These rules can now be setup for your non-production workloads. Auto Stopping shut down compute resources that are idle for a set duration. So, it automatically detects this idle time and shuts down on-demand resources.

You can also run non-production workloads on spot instances to save cost up to 90%. These spot instance are dynamically orchestrated for the same infrastructure. As a result, switch between spot instances are without any interruptions. Spot instances are terminated when not in use and are automatically started when there is traffic or usage requests.

auto-ss.png

Perspectives and Budgets

Perspectives** are the best way to view the correlation of cost data across clouds, clusters, and labels. Perspectives organise multiple resources allocated to a team through multiple cloud providers in one place. Suppose a QA team has access to GCP, and Azure for running tests and quality checks. A QA Perspective would bundle up these resources in a single place where they could be analysed, maintained and regulated together. So, instead of managing cloud costs based on providers, perspectives enable tracking at a team level.

ss_perspectives.png

Budgets** are used to assist perspectives through control checks/limits attached to a team’s allocated cloud resource. Alerts could be sent when the cost exceeds (or is forecasted to exceed) the set budget.

All budgets created in Harness First Generation CMM will be available automatically in Next Generation CCM.

ss_budgets.png

Enhanced Business Intelligence Dashboards

Harness Dashboards helps in measuring software delivery performance. These BI Dashboards are powered by Looker. You may use a built-in dashboard or create a custom dashboard as per requirement. These dashboards are available for data across all the modules. Harness gives you the ability to create your own dashboard to access the key metrics that drives software delivery outcomes.

These Dashboards comes with robust reporting ability, you can set alerts based on preset metrics and schedule reports.

At Harness, we have been working on dashboards that allow you to identify bottlenecks, inform operations, and help drive business decisions. The information and actual metrics may vary based on how engineering teams develop their product.

dashboard ss.jpeg

Conclusion

This blog explained how Harness CCM is an active cloud cost solution, and how it’s at sentry duty with rising cloud cost. To know more about your cloud spending and set up your own cloud cost petrol unit, visit harness.io.

In case you are stuck somewhere, need some assistance, or want to talk about cloud cost in general, join #cloud-cost-management channel in Harness Community Slack.

· 3 min read
Debabrata Panigrahi

This tutorial aims at enabling users to set up a Kubernetes cluster on AWS and will serve as the foundation for your CI/CD pipeline infrastructure. After the infrastructure is ready on a free account, you can proceed to create and install a Delegate.

Credits for AWS

To avail free credits in AWS please follow the following resources:

If you are a student please sign in using AWS Educate

Note: Under the AWS Free tier the EKS service is not available, so it’s suggested to get some free credits and use them for EKS.

Pre-requisites:

There are certain requirements in terms of access and permissions and memory resources for the delegate to function properly.

Creating a Cluster:

Considering you are a first-time user, please consider the following specifications along with the above prerequisites, while creating a cluster:

  • Number of nodes: minimum of 3.
  • Machine type: 4vCPU
  • Memory: 12GB RAM and 6GB Disk Space. 8GB RAM is for the Delegate. The remaining memory is for Kubernetes and containers.
  • Networking: Outbound HTTPS for the Harness connection, and to connect to any container image repo. Allow TCP port 22 for SSH.

For creating a cluster follow the steps mentioned in the documentation, also you can take the help of the demo in the video below.

You will be able to see your cluster, after creation on the management console, like the picture below.

AWS Dashboard

Authenticate to the cluster:

  1. Open a terminal and navigate to where the Delegate file is located.
  2. You will connect to your cluster using the terminal so you can simply run the YAML file on the cluster.

AWS Access

  1. In the same terminal, log into your Kubernetes cluster. In most platforms, you select the cluster, click Connect, and copy the access command.

AWS Configure

  1. Next, install the Harness Delegate using the harness-delegate.yaml file you just downloaded. In the terminal connected to your cluster, run this command:

    kubectl apply -f harness-delegate.yml
  2. The successful output would look like this

delegate-install

  1. To validate run the following command and check.

    # kubectl get namespaces
    NAME STATUS AGE
    default Active 29h
    harness-delegate-ng Active 24m
    kube-node-lease Active 29h
    kube-public Active 29h
    kube-system Active 29h

Also, you could check for pods under your AWS cluster to find the delegate

delegate pods

  1. Now that your cluster is operational, you may add resources to it by using the kubectl utility, as you can see. Please use Start Deploying in 5 Minutes with a Delegate-first Approach tutorial to install Delegate at this time and move forward with creating your CI/CD pipeline.

Warning: You have to exit the present pipeline without saving to view delegate details/continue with further steps.

  1. You could check about your delegates on the dashboard under Project Setup.

check-delegate

  1. The delegate details would look something similar to this

delegate-available

Note: Apart from the above mentioned way, there are other ways to install delegate on AWS, for eg using EC2.

Need further help?

Feel free to ask questions at community.harness.io or join community slack to chat with our engineers in product-specific channels like:

#continuous-delivery Get support regarding the CD Module of Harness. #continuous-integration Get support regarding the CI Module of Harness.

· 4 min read
Hrittik Roy

Creating a delegate requires the creation of an infrastructure in which computational tasks can take place. The infrastructure is typically a Kubernetes cluster.

This tutorial shows you how to set up a Kubernetes cluster on Azure and will serve as the foundation for your CI/CD pipeline infrastructure. After the infrastructure is ready on a free account, you can proceed to create and install a Delegate.

Student Account

If you’re a student, you’re in luck as there is Azure for Students where you can sign in with your educational email address to create an account without a credit card to get $100 worth of credits.

These credits can be used to deploy the Kubernetes Cluster and other services if required.

To, get started with the account creation go to Azure for Students.

Step 1: Click on Activate Now

Activate Free Account

Step 2: After signing in with a Microsoft account, enter your educational email address:

Activate Azure for Students

Step 3: Sign in to Azure Portal!

A free Azure Account

For anyone who can verify their identity with a phone number and a credit card, Azure offers a free account with $200 in Azure credit. Once your account has been verified, you can create a Kubernetes cluster in it.

Step 1: Go to the Azure Free Account Page

Step 2: Click on Start free to start the account creation procedure

Azure Free Account

Step 3: Fill in the following fields

Fill Details

Step 4: Once your details are in click on Sign Up after you have accepted the terms and conditions.

Sign Up Credit Card

Step 5: Verify your phone number

Step 6: Put in your CC details and depending upon your Region a small amount will be deducted and refunded for verification.

Step 7: You can access your account using the Azure Portal

Azure Portal

Azure portal is the web-based management console for Microsoft Azure. It provides a single, unified view of all your Azure resources, including compute, storage, networking, and security. You can use the Azure portal to deploy and manage your Azure resources and to monitor their health and usage.

Azure Portal

You will use the portal to create your Kubernetes Cluster and connect to it.

Create a Cluster

The steps to create a cluster will be to use the Azure Kubernetes Service which is the managed Kubernetes offering from Azure. The steps are as follows:

Step 1: Click on Create a Resource after signing in

Create a Resource

Step 2: Search Container and then click on Kubernetes Service

Find Kubernetes Service

Step 3: Click on Create

Create Kubernetes Service

Step 4: On the Basics page, configure the following options for a Delegate to Run:

  • Project details:
    • Select an Azure Subscription.
    • Select or create an Azure Resource group, such as DelegateGroup.
  • Cluster details:
    • Enter a Kubernetes cluster name, such as myEnviroment.
    • Select a Region for the AKS cluster
    • Select 99.5% for API server availability for lower cost
  • Go to Scale Method and change it to Manual as your account might not have sufficient compute quota for autoscaling. Next change the Node Count to 2 image

Step 5: Start the resource validation by clicking Review + Create on your portal. Once validated, click Create to begin the process of cluster creation. Wait a few minutes for the cluster to deploy.

Connect to your cluster

Now, when your cluster is ready you can connect to the Azure Cloud Shel on your portal and open the terminal

Cloud Shell

Navigate to your cluster and click on Connect!

Connect to Cluster

Follow the steps displayed on the right panel and then you can connect to your cluster!

Run kubectl cluster-info to display details on your cluster!

Next Steps

Now that your cluster is operational, you may add resources to it by using the kubectl utility, as you can see. Please use Start Deploying in 5 Minutes with a Delegate-first Approach tutorial to install Delegate at this time and move forward with creating your CI/CD pipeline.

Need further help?

Feel free to ask questions at community.harness.io or join community slack to chat with our engineers in product-specific channels like:

· 3 min read
Debabrata Panigrahi

Are you confused with terminologies like Access Token, Access Control, and Personal Access Token while creating connectors? In this article, we will discuss a few such terminologies on the Harness platform, what they mean and what values should be entered against them.

So, in Harness when you are using CI/CD to build or deploy we need access to your source code repository and the enterprise cloud for deployments, and hence encrypted secrets are asked as input. In this blog, I have focused on the common errors faced by beginners while trying to setup GitHub connectors.

To begin with:

  1. Select new connector and from the new connector tab select Github under Code Repositories

    Connector Location

  2. Now it’s time to give a name to your connector, but there’s some entity name convention which you need to follow while naming it. Some common errors observed here are : For ease of understanding across orgs and easy identification, you can also add tags and give an apt description to your connector.

    ![Overview](./overview.png)
  3. It’s time for one of the most confusing steps of the process, giving the exact address for your connector which comes in two levels

    1. Account
    2. Repository

    What’s most intriguing and that first time user’s like me, made a mistake in selecting the connection type, so the suggested method is HTTP for first timers for ease of use and you can fetch this URL for your repository directly from the search bar of your browser or from local clone information available in the repository, which has the following format https://github.com/<account-name> for account URL’s type and https://github.com/<account-name>/<repository-name> for Repository URLs.

    Details

  4. Now, it’s time to add credentials, which are required for the authentication to GitHub repository.

    Credentials

    The value in the username field is the same as your GitHub username, and now the most crucial step of adding credentials, is adding the Personal Access Token as a secret, for that, you need to generate the PAT for your account by allowing adequate repo source control permission, which could be done by following the steps here. Further if you already have a PAT as a secret you could just skip to selecting the same, or else you need to add the generated PAT by selecting the “+New Secrets” and mentioning the PAT under the “Secret Value” field.

    Secrets

    Be careful not to add your GitHub password under the secrets for GitHub, as some users tend to do this and the connector fails to connect.

  5. Now while connecting to the provider it’s suggested to go for the connect through delegate step as it would allow delegates to perform tasks for you based on your requirements.

    Delegate-Setup

  6. Going further to the Delegate Setup step, I would suggest using any available delegate as a beginner, or if you want to use a particular delegate, select the same and click on the empty field under the same to select and add the delegates.

  7. What’s important to consider here is if you’re an absolute beginner using Harness for the first time, or have never created a delegate, please consider creating a delegate first by selecting the “Install new delegate” and following the resources mentioned here, to move forward and add a connector.

Need further help? Feel free to ask questions at community.harness.io or join community slack to chat with our engineers in product-specific channels like:

  1. #continuous-delivery Get support regarding the CD Module of Harness.
  2. #continuous-integration Get support regarding the CI Module of Harness.

· 3 min read
Krishika Singh

Before we begin :

Let us understand what do we mean by delegates and why is it needed

A Harness delegate is a software that you install in your deployment target environment such as local network ,VPC,or cluster and run as a service.The delegate performs all operations including deployment and integration. The delegate connects all your artifacts,infrastructure,collaboration,verification and other providers with the Harness Manager.

Below we have discussed the detailed explanation of how we can install Kubernetes(K8s) delegate.

Prerequisites

  • Hypervisor technology (VirtualBox, VMWare, etc) is a mandate pre-requisite for Minikube and we have to choose the right one based on the platform we are on.

    Prequisites for minikube

  • Installation section in the Minikube Getting Started documentation is well crafted and has steps for all Linux, Mac & Windows along with the architecture and installer type details and the user just has to choose the required details, get the commands and run them!

    Installing Minikube.

  • Minikube will download the required kubectl as part of the installation and configures it.

Installing Harness Delegate

  • Go to Harness

  • Go to Builds and under Project setup click delegates and then click on new delegates delegate

  • Click on kubernetes

    kubernetes

  • Name your delegate and select the size of delegate and also select delegate permissions. Please follow the correct naming convention for naming a delegate.

    • It will show error when you insert any special characters except ‘-’ and make sure name should not start or end with a number delegate

NOTE:These sizing requirements are for the Delegate only.Your cluster will require more memory for Kubernetes, the operating system, and other services,preferably one should have double the memory and node present in the cluster than that of required for the delegate for smooth functioning.

  • Download the yaml file yaml

  • After clicking on continue open the new terminal and open the directory where you have downloaded the yaml file and then run the following command:

    kubectl apply -f harness-delegate.yml

    download

  • It may take few minutes for verification,after successful installation of delegate following message will be displayed:

download2

  • You can go to the delegate section in the project setup and see the delegate you have installed:

delegate option

  • You can also delete your delegate when no longer in use

Note: Our Kubernetes Delegates are immutable , that is you can only create and delete the delegate but you can’t make any changes to them.

· 5 min read
Krishika Singh

Hey !! new to the Harness Platform, we are here to help you find your way around.

Harness is the industry's first Software Delivery Platform to use AI to simplify your DevOps processes - CI, CD, Feature Flags, Cloud Costs, and much more.

Let's get started with a short introductory video about the harness platform.

Hope you have got an idea of how interesting is the Harness Platform.

Don't forget to signup at Harness platform to play around with the product.

Let's dive deep and explore our products so that we can help you around with your goals.

Before starting we highly recommend you to go through some basic key concepts about Harness Platform.

Harness CI(Continuous Integration)

Harness CI simplifies the development and testing of code. In Harness Pipelines, you visually model your build and test processes as CI Stages. Each Stage includes steps for building, testing, and pushing your code.

Well let's get you started with your first pipeline, and we are sure you are going to enjoy it, Harness has step by step guide for building different sample pipelines for different languages, you can try any one of them or all of them:

Don't forget to through the docs as well as the courses:

Harness CD(Continuous Delivery)

Harness CD is a Self-Service Continuous Delivery module that enables engineers to deploy on-demand without scripts, plugins, version dependencies, toil, downtime, and anger.

In each Stage, you define what you want to deploy using Services, where you want to deploy it using Environments, and how you want to deploy it using Execution steps. You can refer to the docs below and get familiar with some basics as well deployment tutorials.

You can go through the following docs to get familiar with the basics as well as deployment tutorials as well as sample CD pipeline for you to try out:

You can go through Harness docs as well as Harness University courses to get clarity on Harness CD:

Feature Flags

Empower product development teams to quickly release new features, with minimal risk. Test with a specified subset, or roll out to all customers.

Feature flags create private swim lanes for developers where they can ship the feature directly to customers and then control who sees it, get feedback and turn it on and off when needed.

We recommend you follow the below blog and implement your first feature flag, I am sure you are going to love the way it works:

There are some well curated courses as well as docs on Feature Flags that will help you get a much deeper insight into the product :

Cloud Cost Management(CCM)

Harness Cloud Cost Management empowers engineers with cloud cost visibility of their apps, microservices, and clusters. The best part? Tagging isn't required.

Harness provides curated docs as well as courses that can surely help you out with the concept of CCM:

Service Reliability Management

Harness Service Reliability Management (SRM) module helps engineering and DevOps teams to balance feature velocity and bug fixes along with the stability and reliability needs in a production environment.

You can refer to the below docs as well as some organized courses and get yourself onboard with the basics as well the usage of Service Reliability Management:

Those who want to try out SRM, we recommend them to go through the Harness SRM Practitioner exam it will help you in gaining much deeper product knowledge:

Chaos Engineering

Chaos engineering is the discipline of experimenting with a software system in production to build confidence in the system's capability to withstand turbulent and unexpected conditions.

You can go through the below docs and learn more about chaos engineering, we recommend you go through the quick-start guide provided in the documentation and try out your first chaos experimentation:

Harness has structured courses on Chaos Engineering and those who want to try chaos engineering should surely give the Harness Chaos Practitioner Exam:

Security Testing Orchestration

Harness Security Testing Orchestration (STO) enables DevOps and DevSecOps teams to left shift security testing. STO orchestrates scanning, intelligently deduplicating scanner output, prioritizing remediations, and enforcing governance into your Pipeline.

STO puts scanning directly into your Pipelines to ensure that vulnerabilities are caught and fixed before your products are ever released.

You can surely have a look in the below video about the introduction as well as a demo of STO:

You can go through the below docs and get through the basics of the product:

Software Delivery Foundations Certification

You can also give Harness Software Delivery Foundations Certification, it will surely help you in getting much deeper knowledge about the product.

Important links

🌈Join the growing community on Slack, refer Harness Community Communications Guide to interact with the wider community users/contributors, or create topics in community.harness.io

We at Harness are always there to help our community, feel free to slack us on our Community Slack channel (P.S don't forget to join the channel). You can also reach out to us at discourse.